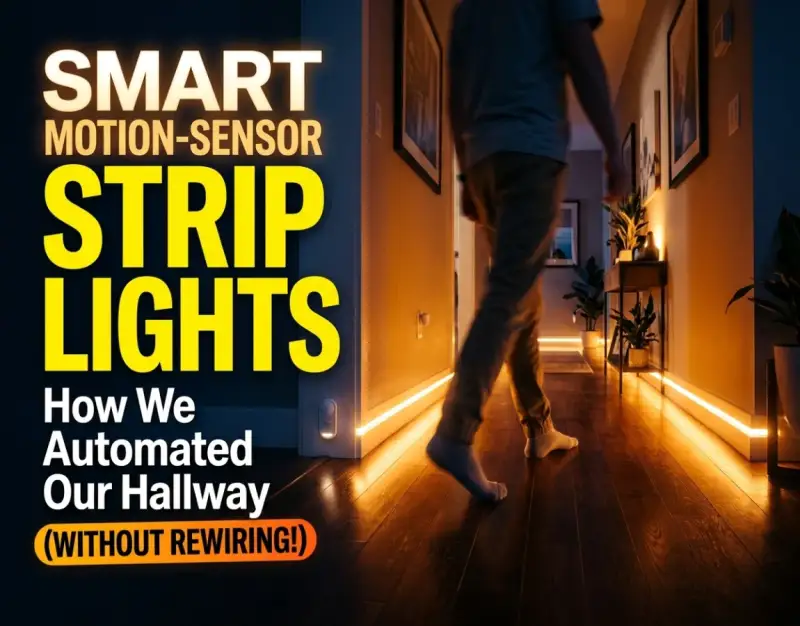
There is a universal domestic annoyance that millions of homeowners quietly endure every single evening: the midnight navigation of a pitch-black hallway. Whether you are tip-toeing to the kitchen for a glass of water, checking on a sleeping child, or simply moving from the home office to the bedroom after a late night of work, fumbling along dark walls for a mechanical light switch is an exercise in frustration. For decades, the traditional solution to this architectural blind spot required calling a licensed electrician, cutting open drywall, fishing Romex cables through timber studs, and installing heavy-duty gang boxes. For renters and modern homeowners alike, the prospect of invasive remodeling for a simple transitional space made the hassle entirely unjustifiable.
However, the rapid maturation of consumer electronics and home automation has fundamentally rewritten the rules of residential lighting design. Today, ambient illumination is no longer bound by copper wiring or hardwired wall switches. The advent of high-efficiency **motion sensor strip lights** has democratized architectural lighting, allowing anyone to install sophisticated, automated illumination in minutes using nothing more than pre-applied adhesive backings and low-voltage drivers. These systems combine passive infrared (PIR) detection, high-density surface-mount diodes (SMDs), and intelligent ambient light sensors to deliver responsive, contextual lighting that activates precisely when you need it and powers down when you walk away.
As we examine the broader landscape of modern home automation, the shift toward localized, wireless efficiency mirrors other desktop and living space upgrades we rely on daily. Just as modern professionals keep their workspaces tidy with Magnetic Cable Clips That Actually Stay Stuck: 5 Clean Desk Upgrades to eliminate wire clutter, the modern smart home demands clean, cordless aesthetics combined with uncompromising performance. In this comprehensive, deep-dive guide, we will unpack the engineering principles behind **wireless LED strips**, walk through a rigorous step-by-step installation blueprint for your hallway, and reveal how you can achieve high-end architectural lighting without ever touching your home's electrical panel.
Foundational Principles: How Motion-Sensor Strip Lights Work
To truly master the implementation of automated hallway lighting, one must first understand the underlying electro-mechanical components that make these systems possible. At a fundamental level, a modern motion-sensor strip light system consists of three primary technological pillars: the detection array, the power and processing unit, and the luminous emission medium. Each of these components must work in flawless harmony to ensure reliable, seamless operation.
The brain and trigger mechanism of the setup is the Passive Infrared (PIR) sensor. Unlike active sensors that emit radio or sound waves, PIR sensors are entirely passive; they do not send out a signal, but instead measure infrared radiation (heat) radiating from objects in their field of view. When a human body—which typically maintains a skin and clothing temperature significantly different from the ambient room temperature—moves across the sensor's segmented zones, it creates a rapid differential in thermal energy detected by the dual pyroelectric elements inside the sensor. This differential generates a microscopic electrical charge, which triggers the onboard microcontroller to close the circuit and illuminate the LED strip.
Complementing the PIR sensor is an integrated photocell, often referred to as a dusk-to-dawn or ambient light sensor (ALS). This tiny photoresistor measures the ambient lux levels in your hallway. If the sun is shining brightly through a nearby window or overhead fixtures are already illuminating the corridor, the ALS overrides the motion trigger, preventing the LEDs from firing unnecessarily and conserving precious battery life. This intelligent gating mechanism ensures that your **automatic home lighting** activates exclusively during dim or nocturnal conditions.
Choosing the Right Hardware: Voltage, Density, and Power
Before touching a single strip of adhesive to your baseboards, you must evaluate the hardware specifications available on the market. Not all LED strips are created equal, and selecting the wrong voltage or diode density can result in uneven illumination, premature battery depletion, or unsightly voltage drop over longer hallway spans.
Evaluating Voltage Configurations: 5V USB vs. 12V vs. 24V Systems
The voltage of your lighting system dictates both its brightness ceiling and its power delivery method. For standard hallway applications, you will generally encounter three primary configurations:
- 5V USB-Powered Systems: Typically driven by rechargeable lithium-ion battery packs or wall adapters. These are exceptionally easy to install and ideal for short runs (under 3 feet) where high lumen output is secondary to convenience.
- 12V DC Systems: The sweet spot for residential accent lighting. Powered by either AA/lithium battery boxes or dedicated plug-in transformers, 12V systems provide a balanced compromise between sustained brightness and efficient power draw over medium lengths (6 to 16 feet).
- 24V DC Systems: Engineered for commercial applications and exceptionally long residential corridors. 24V strips maintain consistent current over extended runs, eliminating the dreaded "voltage drop" phenomenon where LEDs near the end of a long strip appear noticeably dimmer than those near the power source.
Diode Density and Color Temperature Considerations
Another critical metric is the density of the surface-mount diodes, designated by codes like SMD 2835 or SMD 5050, alongside the count per meter (e.g., 60 LEDs/m versus 120 LEDs/m). Low-density strips often produce a visible "dot matrix" effect where individual light sources can be seen reflecting off polished hardwood floors. For a seamless, high-end architectural look, always opt for high-density or COB (Chip-on-Board) LED strips that emit a continuous, uniform ribbon of light.
Furthermore, pay close attention to Color Temperature (measured in Kelvin). For hallway applications, avoid harsh, clinical daylight white (5000K–6500K) which can shock the eyes during nocturnal trips. Instead, look for Warm White (2700K–3000K) or Neutral White (3500K). Warm color temperatures are psychologically calming and prevent the suppression of melatonin when you wake up in the middle of the night.
Step-by-Step Strategic Blueprint for Hallway Installation
Achieving a professional-grade finish that looks like it was installed by a master builder requires meticulous preparation and execution. Follow this rigorous step-by-step blueprint to ensure your wireless lighting installation is robust, visually stunning, and durable over years of daily foot traffic.
Phase 1: Surface Preparation and Spatial Mapping
The single most common point of failure in LED strip installations is premature peeling of the adhesive backing. Dust, microscopic grease particles, and porous wall textures will compromise even industrial-grade 3M adhesive tapes.
- Thorough Cleaning: Wipe down your baseboards or underside of hallway console tables using a 50/50 mixture of isopropyl alcohol and water. Allow the surface to dry completely for at least 15 minutes to eliminate all moisture and oily residues.
- Dry-Fitting and Layout Planning: Unroll your **smart hallway lighting** strips and lay them out along the intended path without removing the adhesive liner. Map out where the PIR sensor will be positioned to ensure an unobstructed line of sight when family members enter the corridor.
Phase 2: Mounting Channels and Diffusers
While you can adhere LED strips directly to clean baseboards, utilizing aluminum LED channels with frosted polycarbonate diffusers elevates the project from a DIY hack to a custom architectural installation.
- Channel Placement: Mount the aluminum channels using either their included mounting clips or heavy-duty double-sided tape. The channels protect the delicate circuit boards from accidental impacts by vacuum cleaners, pets, or shoes.
- Diffuser Insertion: Snap the frosted diffuser cover into place. This crucial element softens the point-source glare of the individual diodes, creating a smooth, professional wash of indirect light along the floorboards or crown molding.
Phase 3: Wiring, Power Management, and Sensor Calibration
With your physical hardware secured, it is time to integrate the power source and fine-tune the sensor parameters for optimal daily performance.
- Secure Connections: Connect the LED strip output leads to the motion sensor control box, ensuring correct polarity alignment (positive to positive, negative to negative). If your system uses solderless snap connectors, press them down firmly with pliers until they click securely.
- Sensor Positioning: Mount the PIR sensor at an optimal height—typically between 18 and 36 inches off the floor if you are illuminating baseboards, or 5 to 6 feet high if you are monitoring overall room entry. Adjust the integrated time-delay dials (setting them typically between 30 to 60 seconds) and lux sensitivity thresholds to match your household's routine.
Real-World Case Studies & Scenarios
To understand the tangible impact of these systems, let us examine two contrasting domestic case studies.
Case Study A: The Suburbian Family Hallway (Successful Execution)
The Miller family, living in a split-level 1970s home, faced a notoriously dark central hallway connecting three bedrooms and a bathroom. With two toddlers prone to midnight bathroom trips, leaving overhead hallway lights on all night was wasteful, while relying on manual switches resulted in stubbed toes and crying children. The Millers installed two 10-foot runs of warm-white, battery-backed **motion sensor strip lights** along the baseboards, paired with aluminum channels. They calibrated the PIR sensors to a 45-second timeout and adjusted the ambient light threshold so the lights only triggered after sunset. The result? A 90% reduction in nocturnal bumps and bruises, zero electrical modification costs, and a battery replacement cycle that only required attention once every six months.
Case Study B: The Unprepped Rental Corridor (Common Failure)
Conversely, a young tenant in an urban apartment attempted a quick weekend lighting upgrade without reading the manufacturer instructions. He purchased a budget 5V USB strip, plugged it into a standard phone brick, and slapped the adhesive directly onto unpainted, textured plaster without cleaning the wall. Within 48 hours, the sagging weight of the USB cable pulled the corner of the strip away from the wall. Furthermore, because the PIR sensor was placed behind a decorative plant stand, the motion detector failed to register movement until people were halfway down the corridor. The project resulted in tangled cords, peeling tape, and a frustrating user experience.
The lesson is clear: success in modern ambient lighting relies entirely on disciplined surface prep, intelligent sensor placement, and respecting the load and power limitations of your chosen hardware.
Critical Mistakes and How to Avoid Them
Even seasoned DIY enthusiasts can fall into common traps when installing automated lighting systems. By recognizing these pitfalls ahead of time, you can safeguard your project against premature failure.
- Ignoring Voltage Drop on Long Runs: Attempting to daisy-chain multiple strips beyond their maximum rated length leads to severe voltage drop, resulting in dull, yellowish light at the far end. Countermeasure: Feed power to long runs from a central injection point or split runs into parallel circuits powered independently.
- Poor Sensor Placement and Obstructions: Hiding PIR sensors behind furniture, curtains, or deep architectural archways blinds the unit to incoming motion. Countermeasure: Always perform a physical walkthrough test during setup to verify that the sensor's cone of detection has an unobstructed view of approach vectors.
- Skipping Surface Degreasing: Applying adhesive backing directly to dusty or greasy baseboards guarantees failure within days. Countermeasure: Never skip the isopropyl alcohol wipe-down and drying phase.
- Using Incompatible Dimming or Power Units: Mixing non-dimmable drivers with PWM (Pulse Width Modulation) controllers can cause audible buzzing and erratic flashing. Countermeasure: Purchase matched, all-in-one kits from reputable manufacturers where the sensor, driver, and strip are engineered to work natively together.
- Setting Insufficient or Excessive Time Delays: Setting the timer to 5 seconds causes the lights to blink off while you are still walking down the hall; setting it to 10 minutes drains batteries rapidly. Countermeasure: Aim for a balanced 30-to-60-second window for transitional hallways.
Comprehensive Comparison Table: Choosing Your Lighting Approach
To help you select the optimal automated lighting strategy for your specific living space, review the structured comparison table below:
| Lighting Approach | Installation Complexity | Primary Power Source | Best Suited For | Estimated Lifespan |
|---|---|---|---|---|
| Hardwired Smart Switches | High (Requires Electrician) | 120V/240V AC Mains | Whole-room overhead fixtures | 10–15+ Years |
| Battery-Powered Motion Strips | Low (Plug & Play) | Rechargeable Li-ion / AA | Rentals & dark baseboards | 2–4 Years (Battery dependent) |
| Plug-In 12V LED Strip Kits | Low-Medium (Adhesive & Outlet) | Wall Outlet Transformer | Permanent hallways with nearby outlets | 5–8 Years |
| Hardwired Low-Voltage Strips | Medium-High (In-Wall Low-Voltage) | Remote DC Power Supply | Custom architectural remodels | 8–12 Years |
Frequently Asked Questions (FAQ)
Will motion-sensor strip lights drain my household batteries too quickly?
Battery longevity depends heavily on hallway foot traffic and whether you choose rechargeable or disposable power cells. In a moderate-traffic household where the lights trigger 10 to 15 times per night for 45-second intervals, modern energy-efficient LED strips powered by high-capacity rechargeable lithium-ion battery packs typically last between 3 to 6 months before requiring a recharge via USB-C. Utilizing the integrated ambient light sensor (ALS) also drastically reduces unnecessary daytime firings, further optimizing battery preservation.
Can I cut LED light strips to fit custom hallway dimensions?
Yes, virtually all standard LED strips feature designated copper solder pads or cut lines spaced every few inches (typically every 3 LEDs). You can safely use a sharp pair of household scissors to snip the strip along these copper markers. However, remember that once a strip is cut, any remaining disconnected segment cannot be powered without soldering a new wire lead or using specialized solderless clamp connectors designed for that specific strip width (e.g., 8mm or 10mm).
How do I prevent the adhesive backing from peeling off painted drywall?
Standard adhesive tapes included with budget LED strips often fail when applied directly to porous, painted drywall or textured surfaces. To ensure a permanent bond, clean the surface with rubbing alcohol first. If you are mounting on difficult textures, reinforce the installation by placing clear silicone adhesive dots every 12 inches or by mounting the strips inside aluminum channels screwed securely into the wall studs or baseboards.
What is the difference between PIR and radar/microwave sensors for strip lights?
Passive Infrared (PIR) sensors detect changes in thermal radiation (body heat) moving across their field of view and require a direct line of sight. Radar or microwave sensors emit low-power electromagnetic waves and detect motion by measuring reflections off moving objects, allowing them to penetrate thin walls, glass, and doors. For hallway strip lighting, PIR sensors are generally preferred because they prevent false triggers from movement occurring behind closed doors or in adjacent rooms.
How can I integrate motion sensor strips into broader smart home ecosystems?
While many budget kits operate as standalone plug-and-play units with onboard PIR sensors, advanced enthusiasts often utilize smart-home compatible controllers (such as Zigbee, Z-Wave, or Wi-Fi enabled LED drivers compatible with Apple HomeKit, Google Home, or Amazon Alexa). These smart controllers allow you to decouple the PIR sensor from the LED strip, enabling complex automation routines—such as dimming the hallway lights to 10% brightness between midnight and 6:00 AM while keeping them at 100% brightness during evening transition hours.
Strategic Roadmap and Final Takeaway
Automating your hallway lighting with modern **motion sensor strip lights** represents the absolute pinnacle of high-utility, low-friction home improvement. By bypassing the traditional hurdles of electrical rewiring, homeowners and renters alike can unlock the safety, luxury, and energy efficiency of responsive architectural lighting in a single afternoon.
As we look toward the next two to five years of smart home evolution, expect to see even deeper integration of edge-AI computer vision, ultra-low-power wireless mesh protocols, and solid-state battery technologies that will render physical power cords virtually obsolete. By implementing the strategic principles, surface preparation techniques, and hardware choices outlined in this guide today, you are not merely illuminating a dark corridor—you are future-proofing your living space for the next generation of ambient technology. Take the initiative, map your hallway, and experience the seamless convenience of lighting that anticipates your every movement.
Be the first to share a gentle reflection on this story.