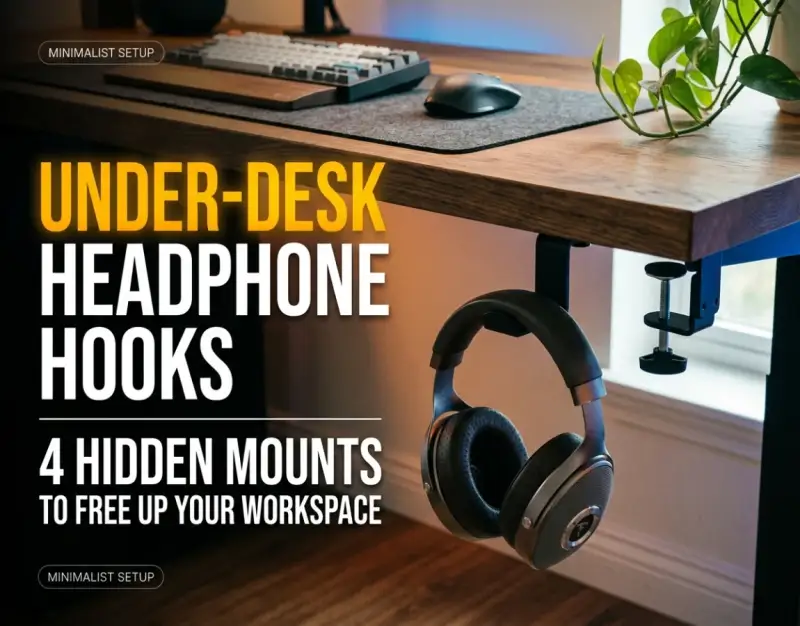
Introduction: The Architectural Evolution of the Modern Workspace
The modern desk setup has undergone a quiet, radical evolution over the past decade. What was once defined by thick texturized mousepads, towering desktop towers, and an unmanaged sprawl of cables has transformed into an exercise in intentional minimalism. As knowledge workers, audio professionals, and remote creators spend upwards of eight to ten hours a day at their workstations, the psychological and physical impacts of spatial clutter have moved to the forefront of ergonomic design. When your workspace is dominated by visual noise—tangling wires, loose peripherals, and bulky accessories resting haphazardly across valuable surface real estate—cognitive fatigue sets in far earlier in the day. Reclaiming your environment is no longer just a matter of aesthetic indulgence; it is a fundamental prerequisite for sustained deep work and productivity.
Among the most notorious culprits of desktop clutter are our personal listening devices. Premium over-ear headphones, studio monitor cans, and gaming headsets are essential tools of the trade, yet their physical footprint is disproportionately large. Leaving them resting on a desk surface consumes valuable inches that could otherwise be dedicated to ergonomic input devices, notetaking, or simply maintaining a clear visual field. Furthermore, tossing expensive audio gear onto a crowded surface exposes them to accidental spills, sliding hazards, and structural compression from heavier items. The industry’s response to this spatial dilemma has given rise to a specialized category of hardware: the under desk headphone hook. By leveraging vertical, gravity-defying planes beneath the desk surface, these hidden mounts fundamentally alter how we interact with our audio gear, transforming dead space into sophisticated functional storage.
To truly master your workspace architecture, every accessory must serve a dual purpose: solving an immediate physical bottleneck while seamlessly integrating into your overarching lifestyle and desktop ecosystem. Just as modern professionals are optimizing their travel kits with accessories like GaN Chargers vs. Stock Bricks: 4 Reasons Your Travel Bag Needs an Upgrade to eliminate bulk, desk organization demands an equally rigorous shift away from archaic desktop clutter. This comprehensive investigation examines four distinct hidden mounts designed to liberate your desk surface, protect your valuable audio investments, and establish an uncompromising standard of spatial efficiency. By exploring the mechanics, strategic placement protocols, and real-world execution of these under-desk solutions, you will learn how to transition your workspace from chaotic to pristine.
Foundational Principles and Mechanics of Under-Desk Mounting
Before selecting a mounting mechanism for your audio gear, it is essential to understand the engineering principles that govern under-desk hardware. Unlike surface-level stands that rely on a weighted base and upright vertical bar, under-desk mounts are subject to continuous shear stress, rotational torque, and gravity. When an over-ear headphone is placed onto a hook beneath a desk, it exerts a downward force coupled with an outward twisting moment, particularly if the mount extends outward from the desk edge. Consequently, the structural integrity of both the mount and the desktop material dictates the long-term success of the installation.
The marketplace generally categorizes under-desk headphone storage into four primary mechanical methodologies: heavy-duty spring clamps, industrial-grade adhesive pads, permanent screw-in brackets, and rotating swivel tracks. Each mechanism offers a distinct balance of installation ease, weight capacity, and aesthetic permanence. For instance, clamp-based designs utilize a C-clamp screw mechanism that bites into the underside and topside of the desk overhang, distributing tension across a broad surface area. Conversely, adhesive mounts leverage high-performance acrylic foam tapes (such as genuine VHB formulations) to create a molecular bond with the desk bottom, bypassing the need for drilling while maintaining a remarkably clean profile.
Material science plays an equally critical role in selecting your hardware. Cheap plastics and unreinforced zinc alloys are prone to stress fractures under cyclical loading—the repetitive motion of hanging and removing headphones day after day. Premium mounts engineered from anodized aluminum, aerospace-grade carbon fiber, or reinforced nylon composites offer superior fatigue resistance. Additionally, the contact surface of the hook itself must be carefully evaluated. A bare metal or hard plastic cradle can abrade expensive leather or protein-leather headphone headbands over time. The best Pocket-Sized Air Dusters: Why Every Keyboard Owner Needs One in Their Kit-level precision must be applied to selecting hooks featuring contoured silicone, premium leatherette, or velvet padding that cushions the headband and distributes weight evenly across the curved arc.
Strategy 1: The Heavy-Duty C-Clamp Hook for Maximum Load Security
Engineering the Overhang Interface
The heavy-duty C-clamp headphone hook is the undisputed workhorse of workspace audio storage. Designed to grip the edge of your desk, this mount bypasses adhesives and screws entirely, utilizing mechanical compression to lock into place. To execute this installation successfully, you must first assess your desk's edge profile. Standard desks with a uniform flat overhang provide an ideal mating surface for the clamp’s upper and lower pads. Ensure your desk thickness falls within the manufacturer's specified tolerance window—typically ranging from 0.5 inches to 2.0 inches. Exceeding or falling short of these tolerances can result in uneven clamping pressure and potential slippage under load.
When positioning the C-clamp, ergonomics and cable management must dictate your placement strategy. Do not simply mount the hook directly in front of your seating position, as this can lead to knee collisions when shifting in your chair. Instead, position the clamp along the lateral edge of the desk—either to your dominant hand side or slightly recessed underneath the right-hand corner. This keeps your headphones instantly accessible while keeping your leg clearance zone entirely unobstructed. Tighten the thumb screw by hand until firm resistance is felt, then give it an additional quarter-turn to seat the internal grip pads securely against the desktop surfaces.
Protecting Your Desktop Finish
One of the hidden risks of mechanical clamping hardware is surface marring. Desks finished in delicate wood veneers, high-gloss lacquers, or soft laminates can easily suffer from compression dents or abrasive scratching if the clamp lacks adequate protective padding. Before tightening your C-clamp mount, inspect the upper and lower contact pads. If the manufacturer-provided rubber pads are thin or missing, supplement them with a small square of dense cork or silicone sheeting. This simple modification increases the friction coefficient, preventing the clamp from migrating laterally over time while completely isolating your desk's finish from hard metal edges.
Furthermore, consider the cable routing integration possible with advanced C-clamp models. Many premium variants feature integrated cable management loops or clips cast into the rear of the vertical shaft. As you hang your wired headphones, you can route the excess slack upward through these integrated channels rather than letting the cord dangle loose. This creates a cohesive, self-contained audio station that looks deliberately engineered rather than haphazardly tacked on. Pair this setup with automated ambient lighting enhancements, such as those inspired by Smart Motion-Sensor Strip Lights: How We Automated Our Hallway Without Rewiring, to cast a subtle, functional glow over your newly optimized peripheral zone.
Strategy 2: The Minimalist Adhesive Mount for Total Desk Invisibility
Surface Preparation and Molecular Bonding
For those pursuing an ultra-clean, floating aesthetic where hardware appears to defy physics, the minimalist adhesive mount is the gold standard. These mounts utilize ultra-thin profiles and high-bond adhesive backing to attach directly to the underside of the desk surface, rendering the mount completely invisible from a normal seated perspective. However, the success of an adhesive mount is entirely dependent on meticulous surface preparation. Skipping the cleaning phase is the single most common reason adhesive mounts fail under load.
Begin by thoroughly cleaning the mounting zone on the underside of your desk using an isopropyl alcohol wipe (70% concentration or higher). This removes residual oils, dust, and manufacturing release agents that act as microscopic release layers. Allow the surface to dry completely for at least sixty seconds. Next, peel away the protective backing from the adhesive strip, taking care not to touch the exposed gel with your fingers, as skin oils degrade the adhesive's initial tack. Firmly press the mount against the underside of the desk, applying consistent, heavy pressure across the entire pad for a minimum of 45 seconds to activate the pressure-sensitive acrylic foam.
Understanding Curing Times and Weight Thresholds
Patience is the ultimate virtue when deploying adhesive-based organization tools. While modern structural adhesives develop immediate tack, achieving their maximum rated shear strength requires a full curing cycle. Resist the urge to hang your expensive studio headphones immediately after installation. Allow the adhesive to cure undisturbed for 24 hours at room temperature. During this window, the polymer chains cross-link and flow into the microscopic pores of the desk material, creating an exceptionally strong bond capable of supporting weights well beyond standard audio gear.
When selecting a minimalist adhesive mount, pay close attention to the declared weight capacity versus the actual weight of your headphones. While many adhesive hooks are rated for up to 5 pounds, heavy audiophile planar-magnetic headphones can push the envelope. Opt for mounts that feature a wide adhesive footprint rather than a narrow strip; surface area distribution is far more critical than raw adhesive thickness when counteracting gravitational shear force. Once cured, this hidden mount achieves the ultimate clear desk space objective, leaving your workspace completely free of visual clutter.
Strategy 3: The Screw-In Permanent Bracket for Heavy-Duty Longevity
Structural Assessment and Pilot Drilling
When your workspace demands absolute, uncompromised load security—such as in professional broadcast environments, heavy gaming rigs, or multi-headphone charging stations—the screw-in permanent bracket is the definitive choice. By anchoring directly into the core material of the desk via threaded fasteners, this mount eliminates any possibility of slipping, sagging, or adhesive failure. However, permanence requires precision. You must first evaluate your desk’s internal construction: solid wood, high-density fiberboard (HDF), or hollow-core particle board.
If your desk is constructed from solid hardwood or thick plywood, installation is straightforward. Begin by holding the bracket in your desired under-desk location and marking the screw hole centers with a fine-tip pencil or center punch. Crucially, you must drill pilot holes slightly smaller than the diameter of your mounting screws. Drilling pilot holes prevents the wood fibers from splitting or mushrooming under the screw threads, ensuring a tight, flush fit. For hollow-core desks, standard wood screws will strip immediately; in these scenarios, you must utilize specialized toggle bolts or hollow-wall anchors rated for overhead shear loads.
Fastener Selection and Torque Management
The quality of the hardware included with screw-in brackets can vary wildly. If the manufacturer supplies soft steel screws with shallow Phillips heads, consider upgrading them to hardened steel or stainless steel fasteners with Torx or hex heads to prevent stripping during installation. When driving the screws into the desk underside, use a manual screwdriver or a drill set to a low clutch torque setting. Overtightening can strip the threads within wood or crush particle board composites, permanently compromising the holding power of the fastener.
Once anchored, the permanent bracket offers an unbreakable foundation for your audio gear storage needs. Because the bracket is rigidly fixed to the desk structure, you can design your workflow around aggressive, rapid movements—grabbing your headphones mid-call or tossing them back onto the cradle without glancing down—knowing the mount will never flex or shift. This unwavering stability is particularly beneficial in fast-paced creative environments where muscle memory and tactile confidence are paramount.
Strategy 4: The Rotating Swivel Track for Ergonomic Accessibility
The Mechanics of 360-Degree Articulation
Static hooks require you to approach your storage from a fixed angle, which can sometimes create awkward wrist maneuvers or require you to reach around obstacles beneath your desk. The rotating swivel track mount solves this ergonomic bottleneck by introducing 360-degree articulation. Built around a heavy-duty ball-bearing pivot or a smooth nylon bushing track, these mounts allow the headphone cradle to swing outward when you need to access your gear and swivel completely out of sight beneath the desk apron when not in use.
The engineering behind a smooth swivel mechanism relies on tight tolerances and self-lubricating materials. When evaluating these mounts, look for models featuring a detent or locking click mechanism at specific intervals (typically every 90 degrees). This prevents the hook from spinning freely on its own momentum every time you brush against it with your knee or chair armrest. The ability to lock the arm flush against the underside of the desk ensures that your headphones remain tucked safely out of the traffic zone while maintaining effortless, fluid rotation on demand.
Integration with Under-Desk Cable Management Trays
Swivel mounts shine brightest when integrated into a comprehensive under-desk cable management strategy. Because the mount moves through an arc, you must ensure that any connected headphone cables do not bind, twist, or snag on nearby power bricks or desk legs during rotation. The best practice is to anchor your headphone cable to the underside of the desk using flexible cable clips, leaving just enough slack to accommodate the full rotation of the swivel arm without putting tension on the audio jack.
Furthermore, positioning your swivel mount adjacent to a power hub or DAC/AMP (Digital-to-Analog Converter/Amplifier) creates a centralized audio zone. When you swing the mount outward, your headphones glide effortlessly into your hand, and the cable feeds smoothly from your desktop audio interface. When finished, a gentle push swings the entire assembly back into the shadows, leaving your workspace pristine and ready for your next focused task. This dynamic interplay between movement and storage represents the pinnacle of modern workspace ergonomics.
Real-World Case Studies & Scenarios
To understand the tangible impact of implementing under-desk headphone storage, let us examine two contrasting case studies from professional environments.
Case Study A: The Audio Engineer’s Studio Transformation
Marcus, a freelance mixing engineer, operated out of a high-end home studio featuring a custom walnut desk, studio monitors, and a primary pair of open-back reference headphones. Previously, Marcus utilized a traditional desktop headphone stand sitting directly to the left of his audio interface. The stand consumed roughly 45 square inches of valuable surface area—space desperately needed for his Stream Deck, MIDI controller notes, and physical mixing consoles. Furthermore, accidental desk bumps caused the tall desktop stand to wobble, twice resulting in his reference headphones crashing to the floor.
The Intervention: Marcus replaced the desktop stand with a heavy-duty C-clamp rotating swivel mount installed on the right-hand underside of his desk apron. The Results: By shifting the headphones off the desk surface, Marcus reclaimed 100% of his primary work zone. The rotating swivel mechanism allowed him to swing the headphones out instantly during mixing sessions and stow them entirely out of sight during client walkthroughs. Over a six-month monitoring period, zero accidental drops occurred, and his desk aesthetic transitioned from cluttered to masterclass minimalist.
Case Study B: The Remote Developer’s Adhesive Failure
Sarah, a senior software architect working remotely, purchased a budget adhesive headphone hook online to clear up space for her mechanical keyboard and macro pads. Eager to complete her setup, she peeled the backing off the hook and pressed it immediately onto the underside of her laminated MDF desk without cleaning the surface or waiting for the adhesive to cure. Within four hours, while hanging her heavy noise-cancelling gaming headset, the mount sheared off completely under the weight, sending her $300 headphones crashing onto the hardwood floor and cracking the plastic headband.
The Post-Mortem & Correction: Sarah’s failure stemmed from two critical errors: skipping surface alcohol decontamination and ignoring the 24-hour polymer curing window. After replacing her damaged headset, she invested in a wider, high-bond adhesive mount engineered with genuine 3M VHB tape. She meticulously cleaned the desk underside with isopropyl alcohol, applied firm pressure for 60 seconds, and allowed the mount to cure undisturbed for a full 48 hours before loading it. The result was an indestructible, flush-mounted storage solution that held firm for years without a single millimeter of slippage.
Critical Mistakes and How to Avoid Them
Navigating the world of under-desk hardware requires foresight. Avoiding the following five critical mistakes will save your equipment, your furniture, and your sanity.
- Mistake 1: Ignoring Weight Capacities and Headphone Specs. Assuming all hooks can hold all headphones. Countermeasure: Always cross-reference the exact weight of your headphones (especially heavy planar-magnetic or studio cans) with the manufacturer’s maximum load rating, adding a 50% safety buffer.
- Mistake 2: Failing to Clean Mounting Surfaces. Pressing adhesive mounts onto dusty, oily desk bottoms. Countermeasure: Always scrub the bonding zone thoroughly with 70%+ isopropyl alcohol and allow complete evaporation before application.
- Mistake 3: Neglecting Ergonomic Knee Clearance. Mounting hooks directly in front of the seating centerline. Countermeasure: Position mounts along lateral desk edges, side panels, or recessed corners to ensure complete freedom of movement.
- Mistake 4: Using Hard, Unpadded Cradles. Hanging expensive leather headbands over bare metal or hard plastic edges. Countermeasure: Ensure the contact surface features thick silicone, leatherette, or velvet padding to prevent permanent headband indentation and wear.
- Mistake 5: Rushing Adhesive Curing Windows. Hanging gear immediately after applying pressure-sensitive tape. Countermeasure: Strictly observe a 24-to-48-hour undisturbed curing period to allow polymer chains to achieve maximum bond strength.
Comprehensive Comparison Table
| Mount Type | Installation Method | Load Capacity | Best Suited For | Aesthetic Impact |
|---|---|---|---|---|
| Heavy-Duty C-Clamp | Mechanical compression clamp | Up to 10 lbs | Heavy studio cans, thick desks | Industrial, highly secure, visible edge profile |
| Minimalist Adhesive | High-bond acrylic foam tape | Up to 3-5 lbs | Light/medium wireless headphones | Completely hidden, ultra-clean floating look |
| Screw-In Bracket | Direct wood/MDF screws | Up to 15+ lbs | Broadcast setups, heavy multi-gear stations | Permanent, rugged, industrial permanence |
| Rotating Swivel Track | Clamp or screw pivot arm | Up to 5-8 lbs | Dynamic workflows, quick access needs | Articulating, versatile, stows completely away |
Frequently Asked Questions (FAQ)
Will an under-desk headphone hook damage my headphone headband over time?
Potential damage depends entirely on the cradle design of the mount you choose. Cheap, narrow metal hooks can concentrate the entire weight of your headphones onto a tiny point of the headband, leading to compressed padding, cracked leatherette, or permanent creases. To prevent this, always select a minimalist headphone mount that features a wide, contoured, and padded resting surface that mimics the natural curvature of your head. This distributes the downward gravitational force evenly across the headband material, preserving the structural integrity and aesthetic condition of your audio gear for years to come.
Can adhesive headphone hooks support heavy audiophile or planar-magnetic headphones?
While standard consumer wireless headphones weigh under a pound, high-end audiophile and planar-magnetic headphones can weigh anywhere from 1.2 to 1.8 pounds. Adhesive mounts *can* support these heavier models, but only if you select industrial-grade variants utilizing genuine VHB (Very High Bond) acrylic foam tape with a wide surface area footprint. Furthermore, you must strictly adhere to surface preparation protocols (using isopropyl alcohol) and allow a full 48-hour curing window before hanging heavy gear. If you are uncertain, mechanical C-clamp or screw-in mounts provide an absolute safety margin for ultra-heavy studio equipment.
Where is the best place to position my under-desk headphone hook for optimal ergonomics?
The ideal positioning depends on your handedness and desk layout, but you should always avoid mounting the hook directly in front of your chest where your knees or legs rest. For right-handed users, placing the mount on the right-hand lateral edge of the desk or tucked slightly under the right front corner provides the most natural, fluid reach. If you utilize a rotating swivel mount, positioning it just behind the front desk apron allows you to swing the headphones out effortlessly with your right hand while keeping them entirely hidden and protected when not in use.
How do I manage headphone cables when using an under-desk mount?
Wired headphones introduce the hazard of tangling and cable drag when removing or stowing your gear. To solve this, integrate under-desk cable management clips or a small cable channel directly behind your headphone hook. Route excess cable slack upward into the clip so that only the necessary length extends to your head or audio interface. If using a rotating swivel mount, leave a small service loop of slack in the cable to ensure that pivoting the arm through its full 360-degree arc never puts tension on the headphone jack or pulls against your audio source.
Strategic Roadmap and Final Takeaway
As workspace design continues to mature over the next two to five years, the boundary between interior architecture and personal technology organization will continue to blur. Desks are no longer passive wooden slabs; they are integrated command centers where every square inch matters. By transitioning your audio gear storage from cluttered surface stands to sophisticated under-desk solutions, you reclaim vital real estate, protect your hardware investments, and cultivate an environment optimized for uninterrupted focus.
Your immediate strategic action plan is clear: evaluate your current desktop setup, audit the weight and style of your audio gear, and select the mounting methodology that aligns with your spatial philosophy. Whether you choose the unshakeable security of a C-clamp, the invisible floating elegance of an adhesive mount, the rugged permanence of a screw-in bracket, or the fluid articulation of a swivel track, reclaiming your workspace starts from beneath. Install your mount with precision, respect your adhesive curing times, and enjoy the profound clarity of a truly optimized workspace.
Be the first to share a gentle reflection on this story.