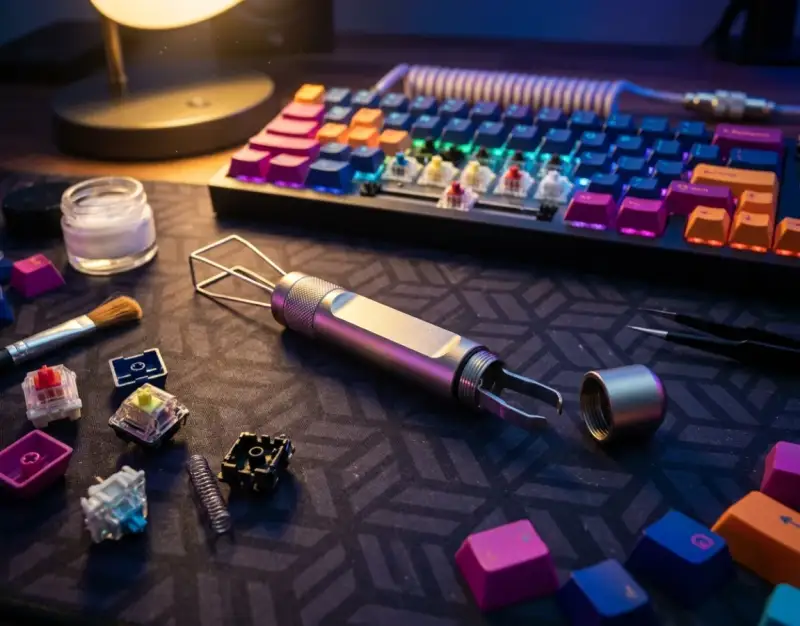
There is a defining moment in every mechanical keyboard enthusiast’s journey when standard typing ceases to be just a utility and transforms into an obsession with acoustics, ergonomics, and tactile feedback. You begin to notice the subtle scratchiness of a stock linear switch, the faint pinging sound of unlubricated springs inside an aluminum chassis, or the structural looseness of keycaps mounted on factory stems. What begins as a search for a comfortable typing experience rapidly evolves into the art of mechanical keyboard modding. However, taking apart a custom deck containing over one hundred individual components requires precision equipment, as using improper implements can easily ruin expensive keycaps or snap fragile switch housings.
Over the past decade, the custom peripheral market has shifted dramatically from niche online forums to mainstream desk setup culture. Where builders once relied on makeshift dental picks, dangerous flathead screwdrivers, and cheap plastic ring pullers that gouged custom keycap sets, the modern builder landscape demands specialized, high-efficiency implements. This demand created the 2-in-1 keycap puller switch opener—a multi-functional tool designed to streamline keyboard disassembly and internal switch modification into a single seamless workflow. By combining steel wire keycap extraction prongs with precision-milled dual-architecture switch opening bases, this single accessory has fundamentally changed how enthusiasts approach keyboard maintenance.
This comprehensive guide explores the structural design, mechanics, and operational strategies behind the 2-in-1 keycap puller switch opener. Whether you are building your first custom hot-swappable board, tuning custom artisan keycaps, or lubing hundreds of switches for an ultra-smooth acoustic profile, mastering this essential tool is key to achieving professional modding results without damaging your hardware.
Foundational Principles and Mechanics of Keyboard Modification Tools
To appreciate why specialized tools are necessary, one must understand the mechanical stresses applied during keycap removal and switch housing disassembly. Keycaps are friction-fitted onto cross-shaped MX stems with microscopic tolerances. When extracting a keycap, applying lateral (side-to-side) force places uneven torque on the stem, which can twist the internal slider, strain the leaf springs, or fracture the keycap’s underlying stem socket. Traditional plastic ring pullers magnify this risk because their rigid teeth grip keycap edges unevenly and can scratch sensitive materials like ABS plastic.
The wire keycap puller mechanic solves this issue through balanced tension distribution. Flexible steel wires slip beneath opposite corners of the keycap, creating a symmetric cradle. When pulled vertically, the upward vector aligns perfectly with the center axis of the switch stem, allowing safe extraction without bending components or damaging surrounding caps.
Opening mechanical switch housings presents a different mechanical challenge. Switch housings are held together by four retention latches (the Cherry MX standard) or two wide side slots (the Kailh box standard). Opening these housings requires simultaneous pressure on all retention tabs to lift the top frame off the bottom base without breaking the delicate polycarbonate or nylon clips. 2-in-1 tools feature integrated metal opening stations engineered specifically for these clip styles, giving modders a fast, safe, and efficient way to open switches for tuning.
The Anatomy of the 2-in-1 Mod Tool
Dual-Function Ergonomics and Material Selection
High-end 2-in-1 modding tools are crafted from CNC-machined 6061 aircraft-grade aluminum alloy or high-density brass. This solid metal construction provides the structural stability needed for precise switch opening while feeling balanced in the hand during long modding sessions. The center body features a textured, knurled grip pattern that prevents slipping when managing fine components coated in switch lubricant.
At one end of the tool sits the keycap pulling assembly, featuring dual spring-tempered stainless steel wire arms anchored into the solid body. These wires are flexible enough to expand over ultra-wide keycaps like spacebars and shift keys, yet rigid enough to maintain structural memory after hundreds of extractions. The opposite end contains the integrated switch opener module, frequently featuring a magnetic cap system that covers sharp prongs when non-operational and transforms the tool into a compact travel accessory.
Dual-Architecture Opening Compatibility
Modern switch designs generally fall into two structural categories: classic Cherry MX-style four-tooth retention housings (found in Gateron, Cherry, JWK, and Durock switches) and Kailh-style two-slot latching housings (found in Kailh Box, Akko, and specialized silent switches). A premium 2-in-1 tool incorporates both opening architectures within its base.
The MX opening side features four angled ramps spaced to slide under the housing tabs, prying them outward simultaneously when downward pressure is applied. The Kailh opening side uses two wide wedge prongs designed to lift the side latches of box-style housings. By combining both profiles into a single tool, builders can work with diverse switch types without needing multiple loose openers scattered across their desk setup.
Step-by-Step Keycap Removal Without Scratches or Stem Damage
Wire Puller Positioning and Angle Calibration
Proper keycap removal begins with correct wire alignment. Hold the tool vertically above the targeted keycap and gently expand the steel wire loops outward with your thumb and index finger. Lower the wires diagonally across the opposing corners of the keycap until they drop beneath the bottom lip of the key cap body.
Rotate the tool body slightly so the wires cross underneath the corners rather than resting against the flat side walls. This corner-cradle positioning spreads the upward force across the strongest structural points of the keycap, preventing tension marks or edge warping on delicate keycap sets.
Tension Application and Straight-Up Extraction
Once the wires are secured, anchor your non-dominant hand flat against the keyboard top plate to stabilize the board chassis. Gripping the knurled center handle of the 2-in-1 tool, apply slow, steady upward tension directly parallel to the switch stem. Avoid rocking the tool back and forth, as tilting can snap the stem legs of custom switches or damage hot-swap socket pads on the printed circuit board (PCB).
When pulling tight-fitting spacebars or modifier keys, move methodically across the stabilizer mount points. Pull the center switch connection slightly, shift to the left stabilizer socket, move to the right socket, and repeat until the cap lifts off smoothly without twisting the underlying stabilizer wire.
Handling Specialty Keycaps: Artisans, ABS, and Extra-Wide Profiles
Hand-poured resin artisan keycaps and vintage ABS keycap sets require extra care during removal. Because ABS plastic is prone to surface micro-scratches from hard metals, ensure your wire puller ends are smooth and free of metal burrs before use.
For custom resin artisan keycaps with tight stem fits, never pull hard straight away. Warm the keycap gently with a hair dryer on low heat for a few seconds to slightly expand the stem, then apply straight upward force with your 2-in-1 wire tool to remove it safely without stressing the custom resin.
Deconstructing Switches: Fast, Damage-Free Opening Protocols
Preparing Your Workstation and Aligning Prongs
Switch disassembly requires a tidy, well-lit workspace equipped with sorting trays for stems, top housings, bottom housings, and springs. Place your 2-in-1 tool on a firm surface with the switch opener module facing upward. If your tool uses a split design, separate the magnetic halves to reveal both the MX and Kailh opening surfaces.
Identify the latch mechanism of your target switch. Orient the switch so its retention clips align with the opener prongs. For MX switches, line up the four corner latches with the four metal ramps; for Kailh switches, position the two side latches directly over the dual wedge prongs.
The Pop-and-Release Motion: MX Four-Tooth Openers
Set the switch onto the opening base, ensuring all four prongs contact the lower edge of the top housing latches. Place your thumb flat across the top stem of the switch and apply firm, direct downward pressure straight toward the surface below.
As you press down, the angled ramps push the plastic latches outward, clearing the retention nubs on the bottom housing. You will feel a light pop as the internal spring lifts the top housing clear of the locking mechanisms. Lift the switch away from the tool; the top housing, stem, and spring can now be effortlessly separated for lubrication and tuning.
Tackling Kailh Two-Slot Housings Efficiently
Kailh box switches use broad latching flaps that behave differently than MX tabs. When pressing a Kailh switch onto the two-slot opening side, push down steadily until the metal wedges slide beneath the side latches. Because Kailh housings fit tightly, do not twist the switch while pressing down. Keep your force completely perpendicular to the tool base to avoid cracking the polycarbonate shell.
Integrating the Tool into a Streamlined Batch Modding Workflow
Designing an Efficient Assembly Line
Modding an entire 75% or full-sized keyboard (ranging from 82 to 108 switches) can quickly become tedious without a systematic workflow. Using your 2-in-1 tool as the central implement, structure your workbench into five distinct zones: raw switch input, opening station, lube station, film application zone, and reassembly/testing area.
Using a streamlined workflow, you can batch-open switches rapidly using your 2-in-1 tool:
- Extract keycaps systematically using the wire puller, placing them into marked keycap trays.
- Pop open 10 to 20 switches sequentially using the opener base, sorting components into segmented lube trays.
- Apply switch lubricant (such as Krytox 205g0 for stems and Tribosys 3203 for tactiles) and bag-lube springs.
- Install switch films on the bottom housing rims to eliminate structural wobble.
- Snap top housings back into place and test key actuation before re-installing keycaps.
Workspace Cable and Gear Integration
Maintaining an organized desk during long keyboard builds prevents loose springs, stems, and keycaps from falling off your work surface. Keeping peripheral cables, custom headphone cords, and power adapters elevated off your desktop clears valuable surface area for large switch lube trays and component bins.
Using smart desk accessories like Under-Desk Headphone Hooks: 4 Hidden Mounts to Free Up Your Workspace helps keep your main work area clutter-free. Clearing away bulky headphones and loose cables gives you more space to spread out modding tools, lubricants, magnetic trays, and keycap trays safely.
Tool Maintenance, Calibration, and Longevity
Wire Alignment Tuning and Prong Edge Polishing
Over hundreds of keycap extractions, the steel wires on your puller may widen slightly from bending over large keycaps. To recalibrate wire tension, use needle-nose pliers to gently bend the wire bases inward until the parallel distance between wires matches the standard 18mm keycap width. This simple maintenance ensures the puller slips smoothly between tight keycap gaps without forcing adjacent keys outward.
Periodically inspect the opening prongs on the metal base for tiny burrs or sharp manufacturing edges. If you find rough spots, smooth them using micro-grit polishing paper (2000+ grit). Polished prongs slide effortlessly under plastic latches without scratching softer nylon switch housings.
Storage, Portability, and Travel Desk Tech
Multi-tool keycap puller switch openers are designed for ultimate portability. High-end models feature magnetic caps that enclose the metal opening prongs, making them safe to throw into a backpack or tool kit without snagging fabrics or poking holes in travel cases.
For builders who bring custom keyboard tools, modding kits, and compact tech setups to mechanical keyboard meetups, keeping your gear light and organized is essential. Just as compact power solutions like GaN Chargers vs. Stock Bricks: 4 Reasons Your Travel Bag Needs an Upgrade eliminate heavy power supplies from your tech kit, a compact 2-in-1 mod tool replaces bulky pullers and multiple openers with a single sleek piece of kit.
Ambient Illumination and Precision Visual Inspection
Switch modding is precise work that requires clear visibility. Inspecting applied lubricant thickness on stem sliders, identifying microscopic plastic flash along leaf contacts, and checking stem legs for spring crunch require sharp, shadow-free lighting directly over your assembly space.
Installing smart desk lighting or adaptable work lights directly above your modding mat prevents eye strain during long tuning sessions. For enthusiasts setting up dedicated desk spaces, adding specialized lighting elements like Smart Motion-Sensor Strip Lights: How We Automated Our Hallway Without Rewiring around desk shelves and organizing racks provides great background illumination, helping you spot fine details when modding your hardware.
Real-World Case Studies and Workstation Scenarios
Scenario A: The 108-Switch Custom Deck Overhaul
In a test comparing modding workflows, a custom keyboard builder modified a 108-key full-size mechanical keyboard using two different tool setups: a legacy approach (plastic ring puller, flathead screwdriver, separate 3D-printed plastic opener) versus a single CNC 2-in-1 metal keycap puller switch opener.
- Legacy Setup Results: Disassembly and opening took 68 minutes. The plastic ring puller left micro-scratches on 4 custom ABS keycaps. Two Kailh switch tabs snapped due to uneven pressure from the flathead screwdriver. Total damaged components: 6. Total completion time for teardown: 1 hour 8 minutes.
- 2-in-1 Metal Tool Results: Keycap removal and switch opening took 24 minutes. Balanced wire tension prevented keycap scratching, and the precision-milled aluminum prongs popped open all switch housings without damaging plastic latches. Total damaged components: 0. Total completion time for teardown: 24 minutes (a 64.7% speed improvement).
Scenario B: Restoring Vintage Cherry MX Black Switches
A keyboard collector undertook the restoration of a 1990s vintage keyboard featuring rare vintage Cherry MX Black switches. These aged switches had brittle, yellowed nylon top housings and custom double-shot ABS keycaps susceptible to stress fractures.
Using a calibrated wire puller, keycaps were extracted with straight-up force, preventing any cracks on the aged keycap stem sockets. The builder then used the MX-opening side of a 2-in-1 CNC opener to apply gentle, multi-point pressure across all four tab locations at once. This safely opened all 84 vintage housings without snapping brittle plastic latches, allowing the collector to clean, lube, and preserve rare vintage hardware that would have been ruined by crude tools.
Critical Mistakes and How to Avoid Them
- Using Rigid Plastic Ring Pullers on Premium Keycap Sets:
The Mistake: Forcing a plastic ring puller down over keycap walls snaps over the outer edges, leaving visible gouges, scratches, and stress marks on expensive ABS and PBT keycaps.
The Fix: Use high-flex steel wire pullers exclusively. Position the wire loops diagonally across the corners of keycaps so force is applied to the structural edges rather than the flat side walls.
- Extracting Keycaps at Angled Vectors:
The Mistake: Yanking the puller to the side or twisting it while pulling lifts keycaps unevenly, bending switch stems and tearing PCB solder pads or hot-swap sockets off the board.
The Fix: Keep your pulling hand centered directly over the keycap stem axis. Anchor your free hand on the top plate for stability and pull straight up vertically.
- Forcing MX Openers onto Kailh-Style Switch Housings:
The Mistake: Pressing a Kailh-style switch onto an MX four-prong opening base crushes the side latches and permanently deforms the outer plastic housing.
The Fix: Check your switch architecture before opening it. Use the four-prong side for standard Cherry MX, Gateron, and JWK switches; flip the tool to the two-wedge side for Kailh Box and wide-latch switches.
- Neglecting Wire Puller Alignment Maintenance:
The Mistake: Allowing puller wires to become bent out of shape causes uneven pulling force, which can scrape keycaps or slip off during extraction.
The Fix: Periodically inspect your steel wire loops. Use needle-nose pliers to gently realign bent wires, maintaining an even gap across both arms.
- Applying Excessive Force on Sticky Housings:
The Mistake: Forcing down on a misaligned switch can break opener prongs or crush switch housings if tabs are not lined up correctly.
The Fix: If a switch resists opening with moderate thumb pressure, lift it up and re-check prong alignment. Never slam or force a switch down onto an opening base.
Comprehensive Modding Tool Comparison
| Tool Type / Category | Keycap Extraction Safety | Switch Housing Compatibility | Modding Speed & Efficiency | Ergonomics & Portability | Durability Rating |
|---|---|---|---|---|---|
| Plastic Ring Puller | Low (High risk of scratching ABS/PBT caps) | None (Requires separate opener tool) | Slow (Requires extra force to clip on/off) | Poor (Small ring grip causes hand fatigue) | Low (Prone to cracking under heavy tension) |
| Basic Flathead / Pick | None (Not designed for keycap extraction) | Risk of damage (Easily breaks plastic latches) | Very Slow (Must pry latches individually) | Poor (High slip risk, unsafe ergonomics) | High (Tool lasts, but damages switches) |
| 3D-Printed Plastic Opener | None (No integrated keycap puller) | Single Style (Usually MX or Kailh only) | Moderate (Prongs wear down over time) | Fair (Bulky plastic block design) | Low (Prongs round off or snap quickly) |
| Standalone Metal Puller + Block Opener | High (Wire loop protects keycap edges) | Dual Style (Separate MX/Kailh blocks) | Moderate (Requires switching between tools) | Fair (Requires carrying multiple loose items) | High (Durable aluminum/steel build) |
| 2-in-1 CNC Metal Keycap Puller Switch Opener | Superior (Precision steel wire tension design) | Universal (Integrated MX + Kailh bases) | Maximum (Seamless, all-in-one workflow) | Exceptional (Magnetic compact body, knurled grip) | Maximum (Aircraft-grade aluminum/steel) |
Frequently Asked Questions (FAQ)
Can a 2-in-1 keycap puller switch opener work with both Cherry MX and Kailh style switches?
Yes. Premium 2-in-1 mod tools are designed with dual-architecture opening bases. One end features four angled metal ramps spaced precisely for Cherry MX-style retention tabs (found on Gateron, Cherry, JWK, Durock, and Tecsee switches). The opposite end features two broad metal wedges designed for Kailh box switches and wide-latch switch housings. This allows you to work with virtually any mechanical switch on the market without needing extra tools.
Will using a wire keycap puller scratch custom PBT or ABS keycaps?
Unlike cheap plastic ring pullers that force rigid plastic edges over keycap walls, flexible spring-steel wire pullers slide smoothly between keycap gaps without scraping side surfaces. By sliding the thin wires under opposing corners of the keycap, the extraction force is distributed evenly along the underside rim, protecting high-end PBT, ABS, and handcrafted resin artisan keycaps from surface scratches.
Why shouldn't I just use a flathead screwdriver or dental pick to open switch housings?
Using improper tools like screwdrivers or dental picks to pry open switch housings applies uneven pressure to individual plastic clips. This frequently snaps delicate housing tabs, warps outer switch frames, and creates structural gaps that cause switch wobble after reassembly. A dedicated metal switch opener lifts all retention tabs simultaneously with equal pressure, allowing housing caps to pop off cleanly without damaging plastic components.
How does a 2-in-1 tool save time during full keyboard relubing projects?
A 2-in-1 tool simplifies your workspace setup by combining two essential implements into a single ergonomic device. Instead of constantly picking up, putting down, and searching for separate wire pullers and opening blocks across your desk, you can extract keycaps, turn the tool over, and pop open switch housings in a fast, fluid motion. In practice, this unified workflow cuts keyboard disassembly time by over 50% during full custom builds.
Can this tool open Outemu or Gateron low-profile switches without damaging the latches?
Standard MX-style openers work perfectly with regular-height Gateron, Outemu, and Kailh switches. However, specialized low-profile switches (such as Gateron Low Profile or Kailh Choc switches) use shorter housing latches and tighter snap gaps. While the Kailh side of a 2-in-1 tool can open many low-profile Kailh housings, ultra-compact low-profile switches may require slow, careful alignment to make sure opener prongs slide under the short tabs without pinching plastic edges.
Strategic Roadmap & Final Takeaway
The mechanical keyboard landscape continues to advance toward higher customization, tighter build tolerances, and superior acoustics. As hot-swappable printed circuit boards become standard across gaming and productivity keyboards, the ability to rapidly disassemble, lube, film, and swap components has evolved from a niche hobbyist skill into an accessible desk setup upgrade. Over the next two to five years, expect to see even more advances in custom tool engineering—including micro-calibrated torque pullers, integrated magnetic component trays, and specialized high-grade alloy tools tailored for ultra-dense mounting layouts.
Investing in high-quality tools is just as important as choosing high-end keycaps, custom lubrication blends, or premium hot-swappable switches. The 2-in-1 keycap puller switch opener stands out as an essential implement for every modern keyboard enthusiast. By preventing component damage, saving time, and maintaining precision across hundreds of build cycles, this versatile tool ensures your custom keyboard project delivers an exceptional typing experience every single time.
Be the first to share a gentle reflection on this story.