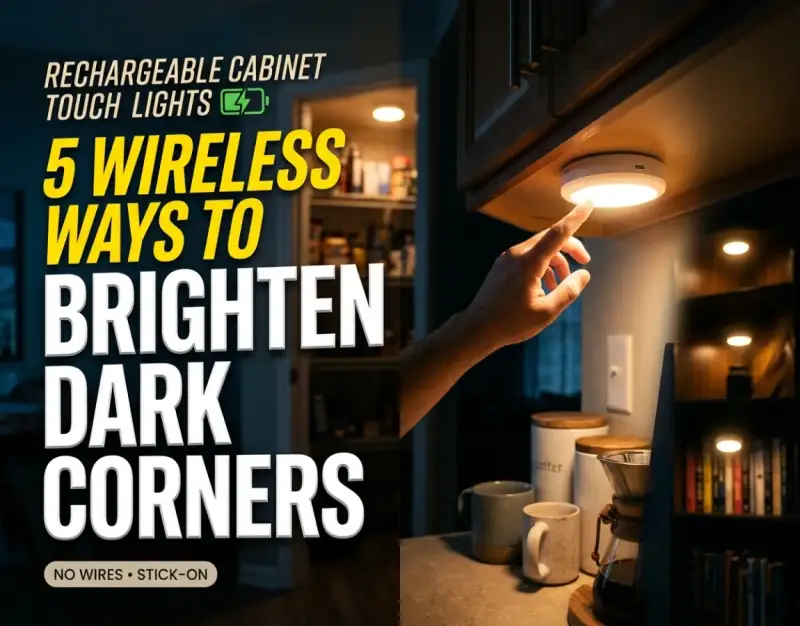
Few domestic frustrations rival the experience of standing in front of a dark kitchen cabinet, pantry, or wardrobe at dusk, blindly rummaging through shadows for a misplaced spice jar or a matching pair of socks. For decades, architectural lighting design treated residential storage spaces as afterthoughts, relying on distant overhead fixtures that cast our own bodies into deep, frustrating silhouettes. Hardwiring permanent under-cabinet lighting has historically meant hiring licensed electricians, cutting into drywall, and managing an invasive maze of low-voltage transformers. Today, a quiet revolution in ambient home technology has fundamentally shifted this paradigm, bringing sophisticated illumination to previously neglected recesses without requiring a single exposed wire or a call to a contractor.
The modern consumer market for home environment enhancement is experiencing a massive pivot toward modular, battery-powered utility tech. At the center of this movement are rechargeable cabinet touch lights—compact, highly efficient fixtures that blend high-lumens-per-watt performance with effortless installation. Whether you are dealing with a light-starved linen closet, a shadowy garage workbench, or a pitch-black under-counter food prep station, these advanced fixtures offer unprecedented flexibility. Beyond simple convenience, optimizing your home's micro-environments often goes hand-in-hand with broader technological upgrades, much like how homeowners analyze their overall household draw using Smart Plug Energy Monitors: How to Track and Slash Your Power Bill to ensure maximum electrical efficiency across every room.
This comprehensive guide explores the structural mechanics, strategic deployment methods, and architectural benefits of outfitting your living space with wireless puck lights and stick-on LED fixtures. By understanding the underlying battery chemistries, thermal dissipation properties, and mounting dynamics, you can transform dark corners into brilliantly lit, highly functional zones. We will walk through explicit step-by-step installation strategies, evaluate real-world case studies, deconstruct common installation mistakes, and answer the most pressing technical questions regarding long-term maintenance and performance optimization.
Foundational Principles and Mechanics of Wireless LED Illumination
To master the implementation of wireless illumination, one must first grasp the core engineering principles governing modern solid-state lighting. Unlike traditional incandescent bulbs that produce light by heating a tungsten filament—wasting up to ninety percent of their energy as infrared heat—light-emitting diodes (LEDs) generate photons through electroluminescence. When electrical current passes through a semiconductor material, electrons recombine with electron holes and release energy in the form of light. This exceptional efficiency is what makes battery-powered operation viable for prolonged periods, transforming tiny lithium-ion cells into powerhouse illumination sources capable of operating for weeks or months on a single charge.
At the hardware level, rechargeable cabinet touch lights rely on integrated circuit boards (ICBs) that regulate voltage, manage power delivery, and interface with touch-capacitive sensors or infrared (IR) motion detectors. The capacitive touch mechanism utilizes a localized electrical field; when a human finger approaches or touches the conductive surface of the light housing, it disrupts this microscopic electrostatic field. The internal microcontroller detects this variance and instantly toggles the circuit state—turning the LEDs on, cycling through color temperatures, or adjusting dimming thresholds. This seamless touch-activation eliminates mechanical toggle switches that are prone to mechanical wear, dust accumulation, and moisture corrosion inside tight cabinet environments.
Energy storage within these fixtures typically relies on rechargeable lithium-polymer (LiPo) or cylindrical lithium-ion cells (such as standard 18650 formats), equipped with built-in Battery Management Systems (BMS). The BMS prevents overcharging, deep discharging, and short circuits, ensuring safety during frequent USB recharging cycles. When paired with high-efficiency surface-mount device (SMD) LEDs—often arranged in concentric or linear arrays behind a frosted polycarbonate diffuser—these lights produce a wide, glare-free beam angle. This optical diffusion is critical for dark corner lighting, as it eliminates harsh hot spots and distributes uniform, shadow-minimizing illumination across deep shelves and cluttered storage areas.
1. Kitchen Prep Stations: Overcoming Under-Cabinet Shadows
The kitchen is arguably the most demanding task environment in any residential home, requiring precise visual acuity for chopping, mixing, and reading fine culinary measurements. Unfortunately, standard kitchen layouts place overhead ceiling fixtures directly behind anyone standing at the counter, casting a dense shadow precisely where the cutting board sits. Installing stick on LED lights along the underside of upper cabinetry instantly eliminates this occupational hazard, bathing countertops in clean, functional light without requiring permanent electrical modifications.
Selecting Optimal Lumen Output and Color Temperature for Food Prep
Choosing the correct brightness and color spectrum is paramount when illuminating food preparation zones. For task-oriented under-cabinet applications, aim for a minimum output of 150 to 300 lumens per linear foot, ensuring bright, even coverage across granite, quartz, or laminate surfaces. Regarding color temperature, avoid overly warm yellow tones (under 2700K) which can distort the visual appearance of fresh ingredients, and steer clear of harsh, clinical blue-whites (above 5000K) that cause eye strain. Opt instead for neutral white (4000K) or daylight balanced (5000K) spectra, which render true, vibrant colors and enhance safety when handling sharp knives.
When positioning your lights, do not mount them flush against the back wall of the cabinet base; this creates uneven pools of light against the backsplash while leaving the front edge of the counter in shadow. Instead, install the fixtures approximately two to three inches back from the front lip of the upper cabinet frame, directing the beam slightly forward and downward toward the center of your work surface. This geometric placement ensures your hands and body do not block the light source while working, maximizing functional visibility.
Implementing Touch-Free vs. Capacitive Touch Control Schemes
Modern kitchens are high-contact environments where hands are frequently wet, covered in flour, or soiled during meal preparation. While capacitive touch lights are wonderful for dry closets, kitchen environments benefit immensely from hybrid models that feature both manual touch buttons and integrated infrared (IR) motion sensors. With an IR sensor enabled, a simple wave of your hand beneath the cabinet instantly triggers the illumination, keeping your fixtures sanitary and smudge-free.
To maximize battery longevity in high-traffic kitchens, configure your fixtures to operate on a short auto-shutoff timer (typically 30 to 60 seconds of inactivity). If your kitchen setup requires prolonged illumination during extended cooking sessions, select models equipped with a manual constant-on override mode. Just remember to manually power down the units when cooking concludes to preserve battery reserves for the following day.
2. Deep Pantries and Closets: Conquering Hidden Depths
Deep pantries and hall closets are notorious black holes where canned goods expire in obscurity and winter coats vanish into shadowy rear corners. Overhead lighting in these confined architectures is largely ineffective because stacked shelves block the vertical descent of light rays. Deploying wireless puck lights vertically along doorframes or horizontally beneath individual shelving tiers shatters this darkness, illuminating every single item from front to back.
Strategic Multi-Tiered Placement for Maximum Shelf Penetration
Lighting a deep pantry requires a tiered deployment strategy rather than relying on a single overhead puck. Begin by installing a puck light on the underside of the ceiling or top shelf, aimed downward to illuminate top-level items. Next, mount slim, low-profile magnetic fixtures beneath the intermediate shelves, spacing them evenly to cascade light downward onto middle and lower storage zones. This layered approach ensures that even the darkest bottom shelf—traditionally reserved for heavy, rarely used appliances—receives ample illumination.
When mounting lights inside enclosed pantries, pay close attention to beam spread and fixture depth. Recessed or flush-mounted stick on LED lights with wide 120-degree optical lenses are ideal here, as they disperse light horizontally across the entire width of the shelf rather than creating a narrow, spotlight effect. This wide-angle diffusion ensures that spice labels, expiration dates, and package details remain legible at a glance.
Harnessing Magnetic Mounting Bases for Effortless Recharging
The single greatest operational challenge of battery-operated closet lighting is the maintenance workflow: having to unstick or unscrew fixtures every time they require a USB recharge. To eliminate this friction, exclusively utilize fixtures that incorporate a dual-component magnetic mounting base. These systems feature a permanent baseplate that adheres securely to wood, wire shelving, or painted drywall using industrial 3M adhesive, while the actual light housing attaches via powerful neodymium magnets.
This magnetic architecture allows you to simply snap the light body off its baseplate, carry it to a central charging station or kitchen USB hub for a quick power replenishment, and snap it right back into place in seconds. No tools, no stripped screws, and no degraded adhesive pads. For homeowners balancing busy travel schedules alongside home improvement projects, keeping accessories organized is key—much like maintaining portable gear essentials such as Compact Travel Steamers: 4 Pocket Wrinkle Removers for Frequent Flyers when packing for business trips.
3. Wardrobes and Walk-In Closets: Elevating Luxury and Organization
Transforming a standard bedroom wardrobe or walk-in closet into a boutique-like luxury space hinges entirely on lighting quality. Poor illumination makes it difficult to distinguish between navy blue and black garments, turning morning dressing routines into guessing games. Upgrading your wardrobe with high-CRI (Color Rendering Index) rechargeable cabinet touch lights ensures that fabric textures, thread details, and true garment colors are rendered with absolute clarity.
CRI Ratings and Fabric Color Accuracy in Small Spaces
When evaluating lighting for clothing storage, lumen output is only half the equation; Color Rendering Index (CRI) is equally critical. CRI is a quantitative measure of a light source's ability to reveal the colors of various objects faithfully in comparison with a natural light source. Always look for stick on LED lights with a CRI rating of 85 or higher (ideally 90+). A high-CRI fixture ensures that rich reds, subtle grays, and complex patterns appear exactly as they would outdoors in natural sunlight, preventing fashion mismatches before you step out the door.
In tall wardrobes with hanging rods, mount slim linear or puck-style lights directly beneath the upper shelf, angling the light downward and slightly forward toward the clothing racks. This illuminates both the garments hanging below and the folded sweaters stacked on upper shelves. For walk-in closets with vertical shoe racks, place miniature puck lights on the interior ceiling of each individual cubby to create a dramatic, retail-display aesthetic.
Programming Motion Sensitivity for Walk-In Convenience
Walk-in closets benefit greatly from PIR (Passive Infrared) motion-activated lighting modes. When you step across the threshold of the closet, the sensor detects your body heat signature and instantly floods the space with light. To optimize this feature, adjust the sensor's directional angle toward the primary entrance walkway rather than dead corners, ensuring immediate activation the moment the door opens.
Furthermore, look for fixtures featuring built-in ambient light sensors (photocells). These intelligent chips ensure that the light will not trigger if the room is already brightly lit by natural sunlight streaming through a window, dramatically extending battery life. This intelligent power management transforms what could be a high-maintenance battery drain into a set-and-forget architectural enhancement.
4. Home Office and Workbenches: Precision Illumination for Detailed Tasks
Whether you are building scale models, soldering circuit boards, reviewing architectural blueprints, or managing paperwork, your workspace requires glare-free, focused illumination to prevent eye fatigue. Overhead room lighting often creates frustrating shadows cast by your own head, hands, or computer monitor arms. Integrating wireless puck lights and compact task bars into your shelving units or hutch workspaces provides targeted, adjustable brightness exactly where your hands are active.
Eliminating Screen Glare and Managing Task Angles
When positioning lighting around a modern desk or workbench, managing reflective glare is critical, particularly if you work with glossy paper, glass-topped desks, or computer monitors. Avoid mounting lights in positions that cast direct reflections onto your display screens or working surfaces. Instead, utilize dimmable rechargeable touch lights mounted beneath upper shelving or hutch valances, directing the beam straight down or slightly backward toward the wall.
Utilizing the dimming functionality built into modern touch lights allows you to tailor the light intensity to the specific task at hand. Set maximum brightness for intricate soldering or craft work, and drop the output to 20 or 30 percent during late-night computer sessions to create a soothing ambient glow. Just as maintaining a clean, uninterrupted desktop surface is essential for productivity—a principle championed by modern enthusiasts who utilize a Desk Mat XXL: Why Every Modern Workspace Needs a Full-Surface Pad to anchor their peripherals—properly zoned task lighting creates an organized, ergonomic visual ecosystem.
Thermal Management and Continuous Duty Cycles
Workbenches and hobby stations often demand longer operational periods than brief pantry visits. When running stick on LED lights for extended durations, thermal management becomes a key performance factor. High-power LEDs generate localized heat at the diode junction; if this heat cannot escape, lumen depreciation accelerates and battery lifespan shortens. Select fixtures constructed with aluminum heat-sink housings rather than cheap plastic shells, as aluminum rapidly dissipates thermal energy and protects internal components during multi-hour craft sessions.
5. Display Cabinets and Bookshelves: Showcasing Collections with Elegance
Display cabinets, fine china hutches, and bookshelf niches are architectural focal points designed to showcase treasured possessions, rare books, family heirlooms, and art collections. Without proper illumination, these displays fade into the background. Traditional incandescent display lighting requires unsightly puck wiring routed through drilled holes in the back of wooden furniture. Modern wireless puck lights provide a pristine, cable-free alternative that elevates displays to museum-quality standards.
Beam Angles, Spotlighting, and Diffused Ambient Glow
The secret to professional display lighting lies in controlling beam geometry and contrast. For deep bookcases containing books or decorative sculptures, wide-angle diffused puck lights create a soft, even wash across the entire shelf. Conversely, if you are highlighting a specific crystal decanter, ceramic vase, or art piece, utilize narrow-beam spotlight fixtures that create dramatic focal points and deep, atmospheric shadows.
Positioning is everything in display architecture. Mount your puck lights near the front upper edge of each shelf, angling the light downward and backward toward the items. This casts light across the face and texture of your collection while preventing the fixture itself from being visible to someone standing in the room. Many advanced touch lights feature wireless remote controls, allowing you to dim entire vertical shelving units simultaneously from across the room.
Color Temperature Selection for Fine Collectibles
The color spectrum of your lighting drastically impacts how artwork and collectibles are perceived. Warm white color temperatures (around 3000K) enhance natural wood grains, pottery, and gold accents, creating a cozy, inviting atmosphere. On the other hand, neutral white (4000K) is superior for modern glass art, silver collections, and vibrant paintings, making colors pop with crisp clarity. Take time to experiment with different color modes if your fixtures offer adjustable CCT (Correlated Color Temperature) functionality.
Real-World Case Studies & Scenarios
Scenario A: The Urban Apartment Kitchen Overhaul
Sarah, an urban apartment dweller renting a compact unit with chronically dark laminate countertops, struggled with poor kitchen visibility. Because her lease strictly prohibited making permanent electrical modifications or drilling into rental cabinetry, traditional under-cabinet hardwiring was out of the question. She invested in a set of magnetic, rechargeable touch lights equipped with adhesive mounting brackets.
Execution & Results: Sarah mounted five slim puck lights along the underside of her upper cabinets using industrial 3M adhesive backing plates. By selecting units with built-in motion sensors and touch dimming, she eliminated all counter shadows during meal prep. When the batteries required recharging after four weeks of daily use, she simply snapped the light bodies off their magnetic bases, charged them via USB-C ports on her kitchen island, and remounted them in seconds. The upgrade cost a fraction of hiring an electrician and left zero damage upon move-out inspection.
Scenario B: The Workshop Storage Failure vs. Success
Mark, an avid woodworker, attempted to illuminate his deep tool storage cabinets using cheap, non-rechargeable battery-operated tap lights powered by standard alkaline cells. Within two weeks, the lights began dimming noticeably as voltage dropped, and replacing the batteries required unsticking the entire fixture housing from the wooden shelf underside, tearing the adhesive pads and frustrating his workflow.
Correction & Optimization: Mark upgraded to heavy-duty, aluminum-housed rechargeable cabinet touch lights featuring modular magnetic brackets and high-capacity lithium-ion cells. He configured them with short auto-off timers and used the USB charging hub on his workbench for easy weekly top-offs. The result was consistent, flicker-free illumination that withstood workshop dust and heavy daily usage without a single adhesive failure.
Critical Mistakes and How to Avoid Them
1. Neglecting Adhesive Surface Preparation
The Mistake: Pressing sticky adhesive backing pads directly onto dusty, greasy, or unfinished wooden cabinet surfaces, resulting in lights crashing down onto countertops mid-night.
The Countermeasure: Thoroughly clean the mounting surface with isopropyl alcohol and let it dry completely before applying adhesive pads. For textured or porous wood, use a light primer or screw-secured mounting brackets if available.
2. Ignoring Battery Capacity and Recharge Frequency
The Mistake: Purchasing ultra-cheap puck lights with minuscule battery capacities (under 500mAh) for high-traffic zones like pantries, requiring constant removal and recharging.
The Countermeasure: Match battery capacity (mAh) to application frequency. Choose 1500mAh to 2500mAh cells for high-use areas, and reserve lower-capacity models strictly for low-traffic decorative shelves.
3. Incorrect Placement Causing Glare or Shadows
The Mistake: Mounting lights flush against the back wall, illuminating the wall instead of the work surface and casting user shadows over tasks.
The Countermeasure: Mount fixtures two to three inches forward from the back wall or toward the front lip of shelving units, directing beams toward the active work zone.
4. Overlooking Color Temperature Consistency
The Mistake: Mixing mismatched fixtures with clashing color temperatures (e.g., pairing a 2700K warm bulb with a 5000K cool bulb on adjacent shelves), creating an amateur visual patchwork.
The Countermeasure: Purchase lighting kits from the same manufacturer or ensure all selected units share identical CCT specifications (e.g., all 4000K neutral white).
5. Exceeding Thermal Thresholds in Enclosed Spaces
The Mistake: Operating low-quality plastic stick on LED lights continuously inside tightly sealed, unventilated compartments, leading to premature diode burnout.
The Countermeasure: Use fixtures with aluminum heat-dissipating chassis and enable motion-sensor or auto-shutoff timer modes to prevent continuous, unattended heat buildup.
Comprehensive Comparison Table
| Lighting Type | Best Application | Power Source | Control Mechanism | Avg. Battery Life |
|---|---|---|---|---|
| Wireless Puck Lights | Bookshelves, display cabinets, deep pantries | Rechargeable Lithium-ion (USB) | Touch / Remote / Motion | 3 to 8 weeks |
| Stick-on LED Light Bars | Kitchen counters, workbenches, wardrobes | Rechargeable LiPo Cell | PIR Motion / Touch Dimmer | 2 to 6 weeks |
| Hardwired LED Strips | Permanent kitchen remodels, architectural coves | Direct AC Wall Transformer | Wall Switch / Smart Home Hub | Continuous (AC Powered) |
| Standard Alkaline Tap Lights | Emergency kits, temporary camping gear | Disposable AA/AAA Cells | Mechanical Tap Lens | 1 to 3 weeks (High fade) |
Frequently Asked Questions
How long do rechargeable cabinet touch lights typically hold a charge?
Battery longevity varies widely depending on battery capacity (measured in milliamp-hours or mAh), LED efficiency, and frequency of daily use. In moderate-traffic environments like a pantry or wardrobe (activated 5 to 10 times per day), a quality rechargeable fixture with a 1500mAh to 2000mAh battery will easily last between four to eight weeks before requiring a USB recharge. High-traffic kitchens or workspaces where lights remain active for extended periods may require recharging every two to three weeks.
Can these lights be installed without drilling or damaging rental cabinets?
Yes, absolutely. The vast majority of modern stick on LED lights are engineered specifically for renters and homeowners who wish to avoid tools and wiring. They utilize industrial-grade 3M double-sided adhesive tape or magnetic mounting plates. The magnetic baseplate adheres permanently to your cabinet surface via adhesive, while the light unit itself snaps magnetically onto the base, allowing you to detach it effortlessly for charging without peeling off any adhesives.
What is the difference between motion-activated and touch-activated lighting?
Touch-activated lights require physical contact (or close capacitive proximity) with the fixture housing to turn on and off, making them ideal for closets and display cases where you want precise manual control. Motion-activated lights utilize Passive Infrared (PIR) sensors to automatically detect body heat and movement, turning on instantly when you open a door or approach a dark corner, and turning off automatically after a set period of inactivity to conserve battery power.
How do I clean and maintain my under-cabinet lighting fixtures?
Maintenance is minimal. To clean your fixtures, first power them off (and detach them from their magnetic mounts if applicable). Wipe the exterior plastic or aluminum housing with a slightly damp microfiber cloth using mild soap and water. Avoid spraying liquid cleaners directly onto the unit or USB charging ports to prevent moisture ingress. Periodically inspect the adhesive mounting pads to ensure they remain secure, especially in humid environments like kitchens or bathrooms.
Are these lights bright enough to serve as primary kitchen task lighting?
While wireless puck lights and LED bars provide exceptional supplementary task illumination for food preparation, chopping, and reading, they are generally designed to complement—rather than entirely replace—primary overhead kitchen lighting. By choosing high-lumen units (200 to 300+ lumens per fixture) and positioning them correctly along the front edge of your upper cabinets, you can achieve brilliant, shadow-free task lighting that fully satisfies everyday culinary demands.
Strategic Roadmap and Final Takeaway
The evolution of solid-state lighting, high-density lithium storage, and capacitive touch technology has forever altered how we illuminate our living spaces. No longer are dark kitchen corners, shadowy wardrobes, and cavernous pantries accepted as inevitable household inconveniences. By thoughtfully deploying rechargeable cabinet touch lights and wireless puck systems, you can achieve professional, architectural-grade illumination without the expense, mess, or permanence of hardwired electrical installations.
Looking ahead over the next two to five years, expect further integration of ultra-low-power microcontrollers, solar-assist trickle charging, and advanced smart-home wireless mesh protocols into compact ambient fixtures. For now, mastering the fundamentals of placement, color temperature, and battery management empowers you to reclaim every dark corner of your home. Take inventory of your light-starved spaces today, select the appropriate mounting strategies outlined in this guide, and experience the immediate, transformative clarity of modern wireless illumination.
Be the first to share a gentle reflection on this story.