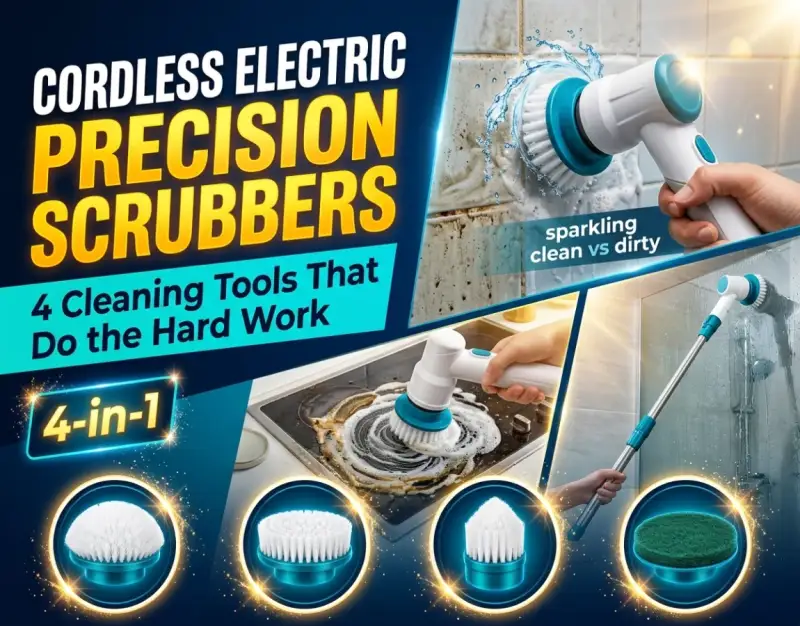
For generations, domestic cleaning has remained stubbornly tethered to manual labor—a grueling cycle of kneeling, scrubbing, twisting, and applying brute force to stubborn soap scum, burnt-on grease, and heavily textured tile grout. The human body, particularly the lower back and wrist joints, bears the brunt of this repetitive physical strain. However, a quiet revolution is currently sweeping through modern households, redefining how we maintain our living spaces. Smart home gear has evolved past robotic vacuums and automated lighting; it has now conquered the dirtiest zones of the home through advanced motorized cleaning appliances that turn hours of exhausting weekend chores into minutes of effortless maintenance.
At the center of this domestic shift is the rise of the high-torque, motorized cleaning implement. Whether you are dealing with mineral-heavy hard water deposits in the shower or sticky residue behind the stove, modern technology has provided a mechanical shortcut. Homeowners are no longer expected to grind away at stains using antiquated plastic bristle brushes and abrasive powders. Instead, high-velocity rotation, oscillating micro-movements, and intelligent torque management do the heavy lifting. By harnessing the power of rechargeable lithium-ion battery packs and planetary gear systems, these devices deliver consistent mechanical energy that far surpasses human physical endurance, making deep cleaning accessible to everyone regardless of physical strength or stamina.
This comprehensive investigative guide explores the anatomy, strategy, and selection criteria surrounding four of the most effective cordless cleaning tools available today. We will examine the core engineering principles that separate professional-grade equipment from gimmicky novelties, break down step-by-step methodologies for transforming every room in your house, and analyze real-world case studies of domestic remediation. Furthermore, we will help you safeguard your home infrastructure—much like installing Smart Leak Detectors: The $25 Device That Can Save Your Home From Water Damage to prevent costly structural failures—by teaching you how to proactively eliminate mold, mildew, and moisture traps before they compromise your property value.
Foundational Principles: The Engineering Behind Motorized Scrubbing
To truly appreciate the value of a high-performance cleaning gadget, one must look beneath the plastic housing to understand the mechanics at play. Traditional manual scrubbing relies entirely on human kinetic energy, which fluctuates wildly over time. A person might start with vigorous enthusiasm, but within three minutes, muscle fatigue sets in, the downward pressure decreases, and the RPM (revolutions per minute) of the scrubbing motion slows down drastically. This inconsistency leaves patches of dirt behind and requires multiple chemical applications to break down surface bonds.
Cordless electric precision scrubbers eliminate this human variable by introducing a controlled power train. Inside the waterproof housing, a micro-DC motor delivers rotational force through a high-reduction gearbox. This gearbox trades raw speed for immense torque—the rotational equivalent of horsepower. When you press the brush head against a rough ceramic tile or a greasy oven rack, the motor maintains its operational velocity rather than stalling out. This sustained friction generates the thermal and mechanical energy needed to shatter molecular bonds in grease, soap scum, and calcium carbonate scaling without requiring you to push down with all your weight.
Battery chemistry and waterproofing standards form the other two pillars of reliability for these devices. Modern units utilize high-density lithium-ion cells capable of delivering steady voltage until the battery is nearly depleted, preventing the frustrating "slow-down" effect common in older nickel-cadmium designs. Furthermore, because these tools operate in wet, soapy environments, they rely on advanced ingress protection (IPX ratings)—typically IPX7—ensuring that internal electrical components remain completely isolated from moisture, cleaning solvents, and accidental immersion during deep-cleaning sessions.
Tool 1: The High-Torque Extension-Rod Electric Spin Scrubber
Anatomy and Ideal Use Cases
The first major tool in our arsenal is the high-torque extension-rod electric spin scrubber, designed specifically to eliminate the need for bending, stretching, and kneeling. Featuring an adjustable telescoping aluminum pole and an articulating motorized head, this device bridges the gap between handheld precision and reach. It is engineered primarily for expansive surfaces such as standing shower stalls, bathtub floors, high bathroom walls, and large tiled kitchen backsplashes.
When operating this tool, the user guides the rotating head across the target zone while the weight of the motor provides the necessary downward force. This makes it an invaluable asset for individuals with chronic back pain, mobility limitations, or simply those who wish to clean an entire master bathroom without breaking a sweat. Interchangeable brush heads—ranging from stiff flat brushes for floors to soft dome brushes for curved tubs—allow the machine to adapt instantly to different surface geometries.
Step-by-Step Operational Methodology
To maximize the efficiency of an extension-rod spin scrubber, preparation is key. Begin by pre-treating the target area with an appropriate cleaning agent—an acidic spray for mineral deposits or an alkaline degreaser for organic grime—and allow the solution to dwell for five to ten minutes. This chemical dwell time breaks down the surface tension of the dirt, allowing the mechanical bristles to sweep away the debris rather than grinding it into the porous surface.
Next, select the appropriate bristle attachment based on the substrate material. Attach the head securely, extend the pole to a comfortable ergonomic length where your arms remain slightly bent, and power on the device at a low speed setting to spread the cleaner evenly. Once distributed, ramp up to high speed and glide the scrubber slowly across the surface in a grid-like pattern. Do not apply excessive downward pressure; let the motorized torque do the work. Finish by rinsing the area thoroughly with clean water and wiping down the brush head to prevent bacterial growth.
Expert Insider Tips for Longevity
To ensure your extension-rod scrubber lasts for years, adopt a strict post-cleaning maintenance protocol. Never submerge the entire pole or charging port in water, even though the brush head is fully waterproof. After every use, detach the brush head and rinse the bristles under warm water, reshaping them by hand before storing them upright to dry. Additionally, charge the lithium-ion battery fully before storing the device for long periods; leaving a battery in a depleted state will permanently diminish its capacity.
Tool 2: The Compact Handheld Cordless Cleaning Brush
Precision Control for Tight Spaces
While large spin scrubbers excel at broad floors and walls, they often lack the agility required for intricate, confined spaces. This is where the compact handheld electric spin scrubber shines. Designed with an ergonomic pistol-grip or cylindrical body, this nimble device concentrates high-frequency oscillation or rotation into a small footprint, making it the ultimate bathroom cleaning gadget for fixtures, faucets, and drain surrounds.
The primary advantage of a handheld unit is tactile feedback. Because your hand is positioned directly behind the motor housing, you can feel the micro-resistance of the surface change as dirt is eradicated. This allows for hyper-localized cleaning around delicate hardware, silicone caulking, and tight corners where mold and mildew love to hide. It transforms tedious detail work into a fast, satisfying process.
Executing Detail-Oriented Cleaning Protocols
To tackle stubborn grime around faucets, sink basins, and window tracks using a handheld cordless brush, start by clearing away loose debris with a dry microfiber cloth. Apply a targeted gel or paste cleaner directly to the stain rather than a watery spray, which will splatter when the brush head spins at high velocity. Point the bristle head toward the target, switch on the device, and use gentle, circular motions.
Pay special attention to grout lines around bathroom sinks and ceramic soap dishes. Utilize pointed cone-shaped attachments to dig deep into 90-degree corners where standard sponges cannot reach. For chrome and stainless steel fixtures, switch to a soft non-scratch scouring pad attachment to polish the metal to a mirror finish without inducing micro-scratches that dull the surface over time.
Troubleshooting Common Operational Hurdles
One common mistake operators make with handheld units is stalling the motor by pressing too hard into narrow crevices. If the brush head stops spinning, back off immediately; forcing a stalled motor can overheat the armature and degrade the internal plastic gears. If you encounter exceptionally stubborn mineral scaling, let a specialized descaling gel dwell longer rather than trying to force the motor to cut through it instantly.
Tool 3: The Multi-Attachment Kitchen Cleaning Tool
Conquering Culinary Residue and Grease
The kitchen presents a unique cleaning challenge quite distinct from the bathroom. While bathroom grime is largely mineral and biological (soap scum, hard water, mildew), kitchen grime is overwhelmingly lipid-based—burnt oils, caramelized sugars, stubborn fats, and protein splatters. A specialized kitchen cleaning tool equipped with specialized scouring pads and medium-stiffness nylon brushes is specifically engineered to cut through these sticky matrices.
Stove cooktops, cast-iron burner grates, oven interiors, and microwave ceilings are notorious hotspots for baked-on food matter. Manual scrubbing of these surfaces often results in scratched glass cooktops or ruined non-stick coatings. Motorized cleaning tools with variable speed controls and soft-abrasive pads provide the exact friction coefficient required to lift burnt carbon without abrading the underlying finish.
Step-by-Step Kitchen Remediation Workflow
Begin your kitchen deep clean by ensuring all surfaces are cool to the touch—never apply chemical cleaners or motorized brushes to a hot stove element or oven interior. Spray a professional-grade food-safe degreaser across the range hood, stovetop, and backsplash. Allow the solution to penetrate the grease layer for ten to fifteen minutes until the film begins to liquefy.
Attach a medium-abrasive scouring pad or nylon bristle brush to your kitchen cleaning tool. Set the device to a moderate speed to prevent chemical splashing, and work systematically from the top of the backsplash down to the stovetop surface. For cast iron burner grates, use a stiff bristle attachment to scrub inside the textured iron grooves. Wipe down the loosened residue immediately with a damp microfiber cloth before it has a chance to resettle.
Maintaining pristine kitchen hygiene is not just about aesthetics; it protects your home's infrastructure and air quality. Pairing your motorized kitchen tool routine with other smart home interventions ensures a completely sanitary culinary environment that protects your family's health.
Tool 4: The Detail-Oriented Grout and Crevice Scrubber
The Physics of Deep Grout Restoration
Tile floors and walls often look dingy not because the tiles themselves are dirty, but because the recessed grout lines have absorbed years of dirt, oils, and mopping runoff. Traditional flat mops slide right over these recessed channels, leaving the dirt trapped below the tile surface. A dedicated grout and crevice scrubber utilizes ultra-narrow, wedge-shaped bristle configurations designed to drop directly into grout channels and maintain constant lateral contact.
The mechanical advantage here is pressure concentration. By narrowing the contact surface area of the brush head down to a width of just a few millimeters, the rotational force of the motor is concentrated into a high-pressure line. This allows the bristles to flick embedded dirt and mold spores right out of porous cementitious grout without requiring you to get down on your hands and knees with an old toothbrush.
Methodology for Flawless Grout Renewal
Restoring dirty grout requires a systematic, multi-step approach. Start by vacuuming the floor thoroughly to remove all loose grit and dust, which can act as an abrasive compound and scratch glazed tiles during scrubbing. Apply an oxygenated bleach cleaner or a specialized alkaline grout cleaner directly along the grout lines using a squeeze bottle.
Equip your cordless scrubber with the narrow grout brush attachment. Position the bristles directly inside the recessed joint, power on the device, and guide it slowly along the length of the grout line. You will immediately see the dark, dingy slurry rising to the surface as the bristles agitate the pores of the grout. Once the entire floor is scrubbed, extract the dirty slurry using a wet-dry vacuum or a damp microfiber mop, then rinse the floor thoroughly with clean water.
Real-World Case Studies & Scenarios
To understand the practical impact of transitioning to cordless electric precision scrubbers, let us examine two contrasting household remediation scenarios involving severe bathroom scaling and kitchen grease accumulation.
Case Study A: The Neglected Master Shower Rejuvenation
The Scenario: A family of four living in a region with extremely hard water had neglected their walk-in glass and tile shower for over eighteen months. Thick pink mold flourished in the silicone corners, and a chalky, mineral-heavy soap scum layer obscured the lower half of the ceramic tile walls. Previous manual cleaning attempts using sponges resulted in severe shoulder fatigue and yielded disappointing cosmetic results.
The Execution: The homeowners deployed a high-torque extension-rod electric spin scrubber paired with an acidic descaling foam. They allowed the foam to dwell for fifteen minutes. Using the flat brush attachment on high speed, they cleared the expansive wall tiles in under ten minutes. They then swapped to a handheld cordless brush with a pointed crevice attachment to clear the mold from the silicone corners. The entire job was completed in 25 minutes with zero physical strain.
The Takeaway: By replacing human kinetic inconsistency with consistent motor torque, the cleaning time was reduced by 80%, and the physical toll dropped from severe muscle soreness to zero discomfort.
Case Study B: The Post-Holiday Kitchen Degreasing
The Scenario: Following an intensive holiday cooking marathon, a home kitchen featured heavily burnt grease splatters across the stainless steel range hood, heavy carbon buildup on the oven racks, and sticky oil residue coating the kitchen cabinet faces above the stove.
The Execution: The homeowner applied a gel degreaser and utilized a multi-attachment kitchen cleaning tool. Using soft non-scratch pads on the cabinet faces and stainless steel hood, the grease lifted effortlessly without marring the finishes. For the heavy oven racks, a stiffer nylon brush attachment pulverized the carbonized crust in minutes.
The Takeaway: Using specialized attachments matched to delicate versus durable surfaces prevents permanent property damage while achieving professional-grade cleanliness.
Critical Mistakes & How to Avoid Them
Even with advanced automated cleaning tools, improper technique can lead to subpar results, damaged surfaces, or premature hardware failure. Here are the top five mistakes practitioners make and how to avoid them.
- Applying Excessive Downward Pressure: Pushing down with all your weight onto a spin scrubber does not clean faster; it actually bogs down the planetary gearbox, reduces motor RPM, and drains the battery prematurely. Countermeasure: Let the weight of the device do the work; guide it gently across the surface.
- Using the Wrong Brush Stiffness on Delicate Surfaces: Using stiff nylon or abrasive wire brushes on acrylic tubs, fiberglass, or glass cooktops will cause permanent micro-scratches and dullness. Countermeasure: Always match your attachment to the substrate—use soft sponges and non-scratch pads for polished and delicate surfaces.
- Neglecting Chemical Dwell Time: Expecting the motor to instantly grind through unsoftened grease or scale without chemical assistance wastes battery power and strains the motor. Countermeasure: Always apply cleaners and allow a 5-to-10 minute chemical dwell time before powering on the scrubber.
- Failing to Clean and Dry Attachments Properly: Storing damp, dirty brush heads inside a dark cabinet creates an ideal breeding ground for bacteria, mold, and unpleasant odors. Countermeasure: Rinse all attachments thoroughly with warm soapy water after every use, reshape the bristles, and store them upright to dry completely.
- Improper Battery Storage and Charging: Leaving lithium-ion batteries completely discharged for weeks or months destroys their internal chemical stability and ruins their holding capacity. Countermeasure: Charge units fully after use and store them in a climate-controlled environment away from freezing temperatures or extreme heat.
Comprehensive Comparison Table
To help you select the ideal configuration for your specific household cleaning requirements, the semantic comparison table below outlines the key attributes, optimal surfaces, and primary benefits of the core tool categories discussed in this guide.
| Tool Category | Primary Cleaning Focus | Optimal Surface Materials | Key Mechanical Advantage | Ideal User Profile |
|---|---|---|---|---|
| Extension-Rod Spin Scrubber | Expansive floors, shower walls, high ceilings | Ceramic tile, porcelain, fiberglass, glass stalls | Extended reach, high torque, eliminates bending | Homeowners with large bathrooms or mobility limits |
| Compact Handheld Brush | Faucets, drains, hardware, tight corners | Chrome, stainless steel, silicone caulking, ceramics | High-frequency oscillation, tactile precision | Detail-oriented cleaners and neatness enthusiasts |
| Multi-Attachment Kitchen Tool | Grease, carbon, burnt food, oily residue | Cast iron, enamel, stainless steel, glass cooktops | Variable speed control, lipid-cutting scouring pads | Home cooks and culinary enthusiasts |
| Grout and Crevice Scrubber | Recessed channels, tile joints, narrow gaps | Cementitious grout, epoxy grout, tight architectural joints | Concentrated line-pressure bristle configuration | Perfectionists restoring old tile flooring |
Frequently Asked Questions (FAQ)
Can cordless electric spin scrubbers scratch delicate acrylic bathtubs?
Yes, if you use the incorrect bristle attachment. Stiff nylon or abrasive scouring pads designed for heavy tile grout can easily scratch softer acrylic and fiberglass surfaces, leaving a dull, matte finish that attracts dirt even faster. To prevent this, always select soft sponge pads or ultra-fine non-scratch bristle heads when cleaning acrylic bathtubs and shower surrounds. Always test a new brush attachment on an inconspicuous corner before tackling the entire fixture.
How long do the batteries typically last on a single charge during heavy cleaning?
Battery runtime varies based on motor load, speed settings, and battery capacity, but most quality cordless cleaning tools offer between 45 to 90 minutes of continuous operational time on a single charge. This is more than enough time to deep-clean multiple bathrooms or an entire kitchen in one session. It is best to charge the device fully before starting a major cleaning project to ensure uninterrupted workflow.
Are these motorized scrubbing tools safe to use with bleach and harsh chemical solvents?
While the exterior plastic housings and brush bristles are chemically resistant to standard household cleaners, you should exercise caution when using concentrated chlorine bleach or heavy industrial acids. These harsh chemicals can degrade rubber seals over time and irritate your skin and lungs when atomized by a spinning brush head. Whenever possible, pair your motorized scrubber with oxygen-based cleaners, enzymatic degreasers, or mild acidic descalers for safer, equally effective cleaning.
Can I submerge the entire scrubber underwater if I am cleaning the bottom of a deep tub?
No. While almost all modern electric spin scrubbers feature waterproof brush heads (typically rated IPX7), the upper pole connections, handle grips, and charging ports are usually only water-resistant (IPX4 or IPX5). Submerging the entire unit can force water past internal seals, short-circuiting the motor and destroying the electronics. Always keep the motorized handle above the waterline during operation.
Do I still need to use manual elbow grease when operating an electric cleaning tool?
The primary benefit of these devices is that they replace human kinetic effort with motor torque. You do not need to push down hard or scrub back and forth manually. Your only role is to guide the tool smoothly across the surface, letting the high-speed rotation and specialized bristles lift away the dirt. This drastically reduces physical fatigue in your wrists, arms, and lower back.
Strategic Roadmap & Final Takeaway
The transition from manual domestic labor to motorized precision cleaning represents a permanent evolution in smart home gear. As battery densities continue to improve, motor efficiencies rise, and ergonomic designs become more refined, manual scrubbing is rapidly becoming obsolete. Investing in a versatile arsenal of cordless cleaning tools is no longer a luxury; it is a smart strategy for preserving your home's infrastructure while protecting your physical well-being from the repetitive strain of traditional housework.
Your strategic roadmap moving forward is simple: Assess the primary problem zones in your home—whether it is hard water scaling in the bathroom, stubborn grease in the kitchen, or dingy tile grout in the hallways. Select the appropriate specialized tools outlined in this guide, adopt proper chemical dwell-time protocols, and commit to regular post-cleaning maintenance. By letting technology do the hard work, you will maintain a pristine, healthy living environment with a fraction of the time, stress, and physical effort.
Be the first to share a gentle reflection on this story.